WPML Language Switcher

Full disclosure: WPML is a great WordPress translation plugin. We’re writing a series of posts to help users get the most from some of WPML’s common features. Weglot is also a great tool for translating your WordPress site, but sometimes all you need is a little help to point you in the right direction with WPML, which is what this post will do for WPML’s front-end language switcher feature.
WPML is one of the oldest WordPress translation plugins and they’ve rightfully developed a great reputation in the multilingual WordPress space.
The WPML language switcher feature lets you create a front-end option for your visitors to choose their preferred language on your WordPress site.
However, some people struggle with the style and positioning of the WPML language switcher, which is why you might find an alternative solution interesting.
In this post, you’ll learn a little more about how the WPML language switcher works, as well as an alternative way to add a language switcher to WordPress that you might prefer.
How the WPML Language Switcher Works
To configure the WPML language switcher, you can use the Languages section under the WPML menu.
There, you’ll be able to control the order of the languages in your language switcher, as well as the different positions that WPML offers. Currently, you can add your WPML language switcher in the following locations:
- Menu
- Widget
- Footer
- Link (above or below your blog posts)
You can also use a shortcode or PHP function for custom placements.
However, you cannot add a floating WPML language switcher by default. If you want to create a floating WPML language switcher, you’ll need to use your own custom code, or hire a developer to do it for you.
Learn more about finding the best translation plugin for your WordPress site:
Weglot: An Alternative to the WPML Language Switcher
Weglot is a popular WordPress translation plugin that makes it easy to create a multilingual WordPress site. It offers an alternative approach to translating your WordPress site, including an alternative to the default WPML language switcher functionality, which some users find to be more convenient.
With Weglot, you can translate 100% of your WordPress site, including all the content from your theme and plugins (without requiring any special compatibility). Weglot starts by automatically translating your content with automatic translation. Then, you can go back and manually refine your translations or outsource them to professional translation services.
In addition to managing your translations, Weglot also makes it super easy to manage and display a front-end language switcher for your visitors.
By default, Weglot adds a floating language switcher to your site right away, which is something you can only do by adding custom code to the WPML language switcher.
Additionally, Weglot still gives you the same level of flexibility, letting you also use your language switcher as a menu item, widget, shortcode, or in your site’s code.
You’ll also be able to customize other aspects of your language switcher without needing any technical knowledge, like how language flags and names look.
How the Weglot Language Switcher Works
With Weglot, translating your site only takes a couple of minutes. All you do is sign up for a Weglot account, install and connect the plugin, and choose the original language and destination language(s) that you want to use:
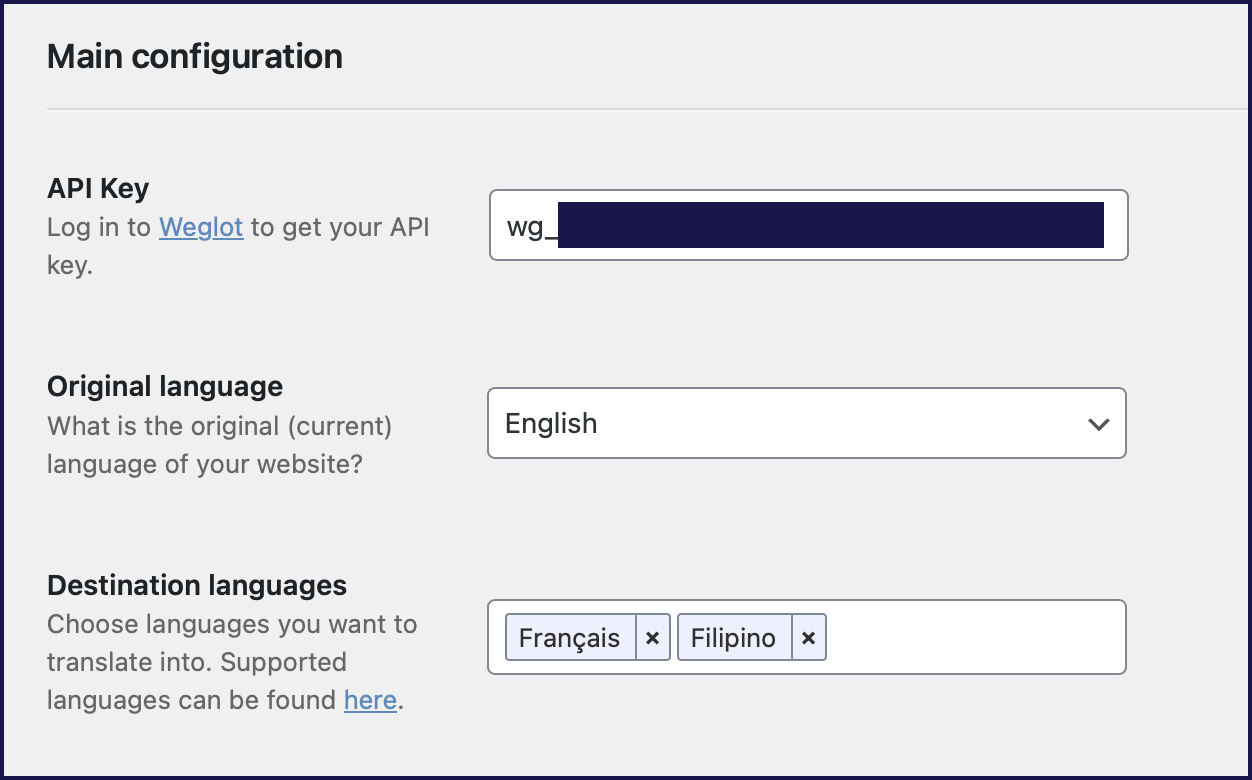
As soon as you activate the plugin, Weglot uses automatic translation to translate your site and it also automatically adds a floating language switcher in the bottom-right corner of your site.
You can see the language switcher on the homepage below:
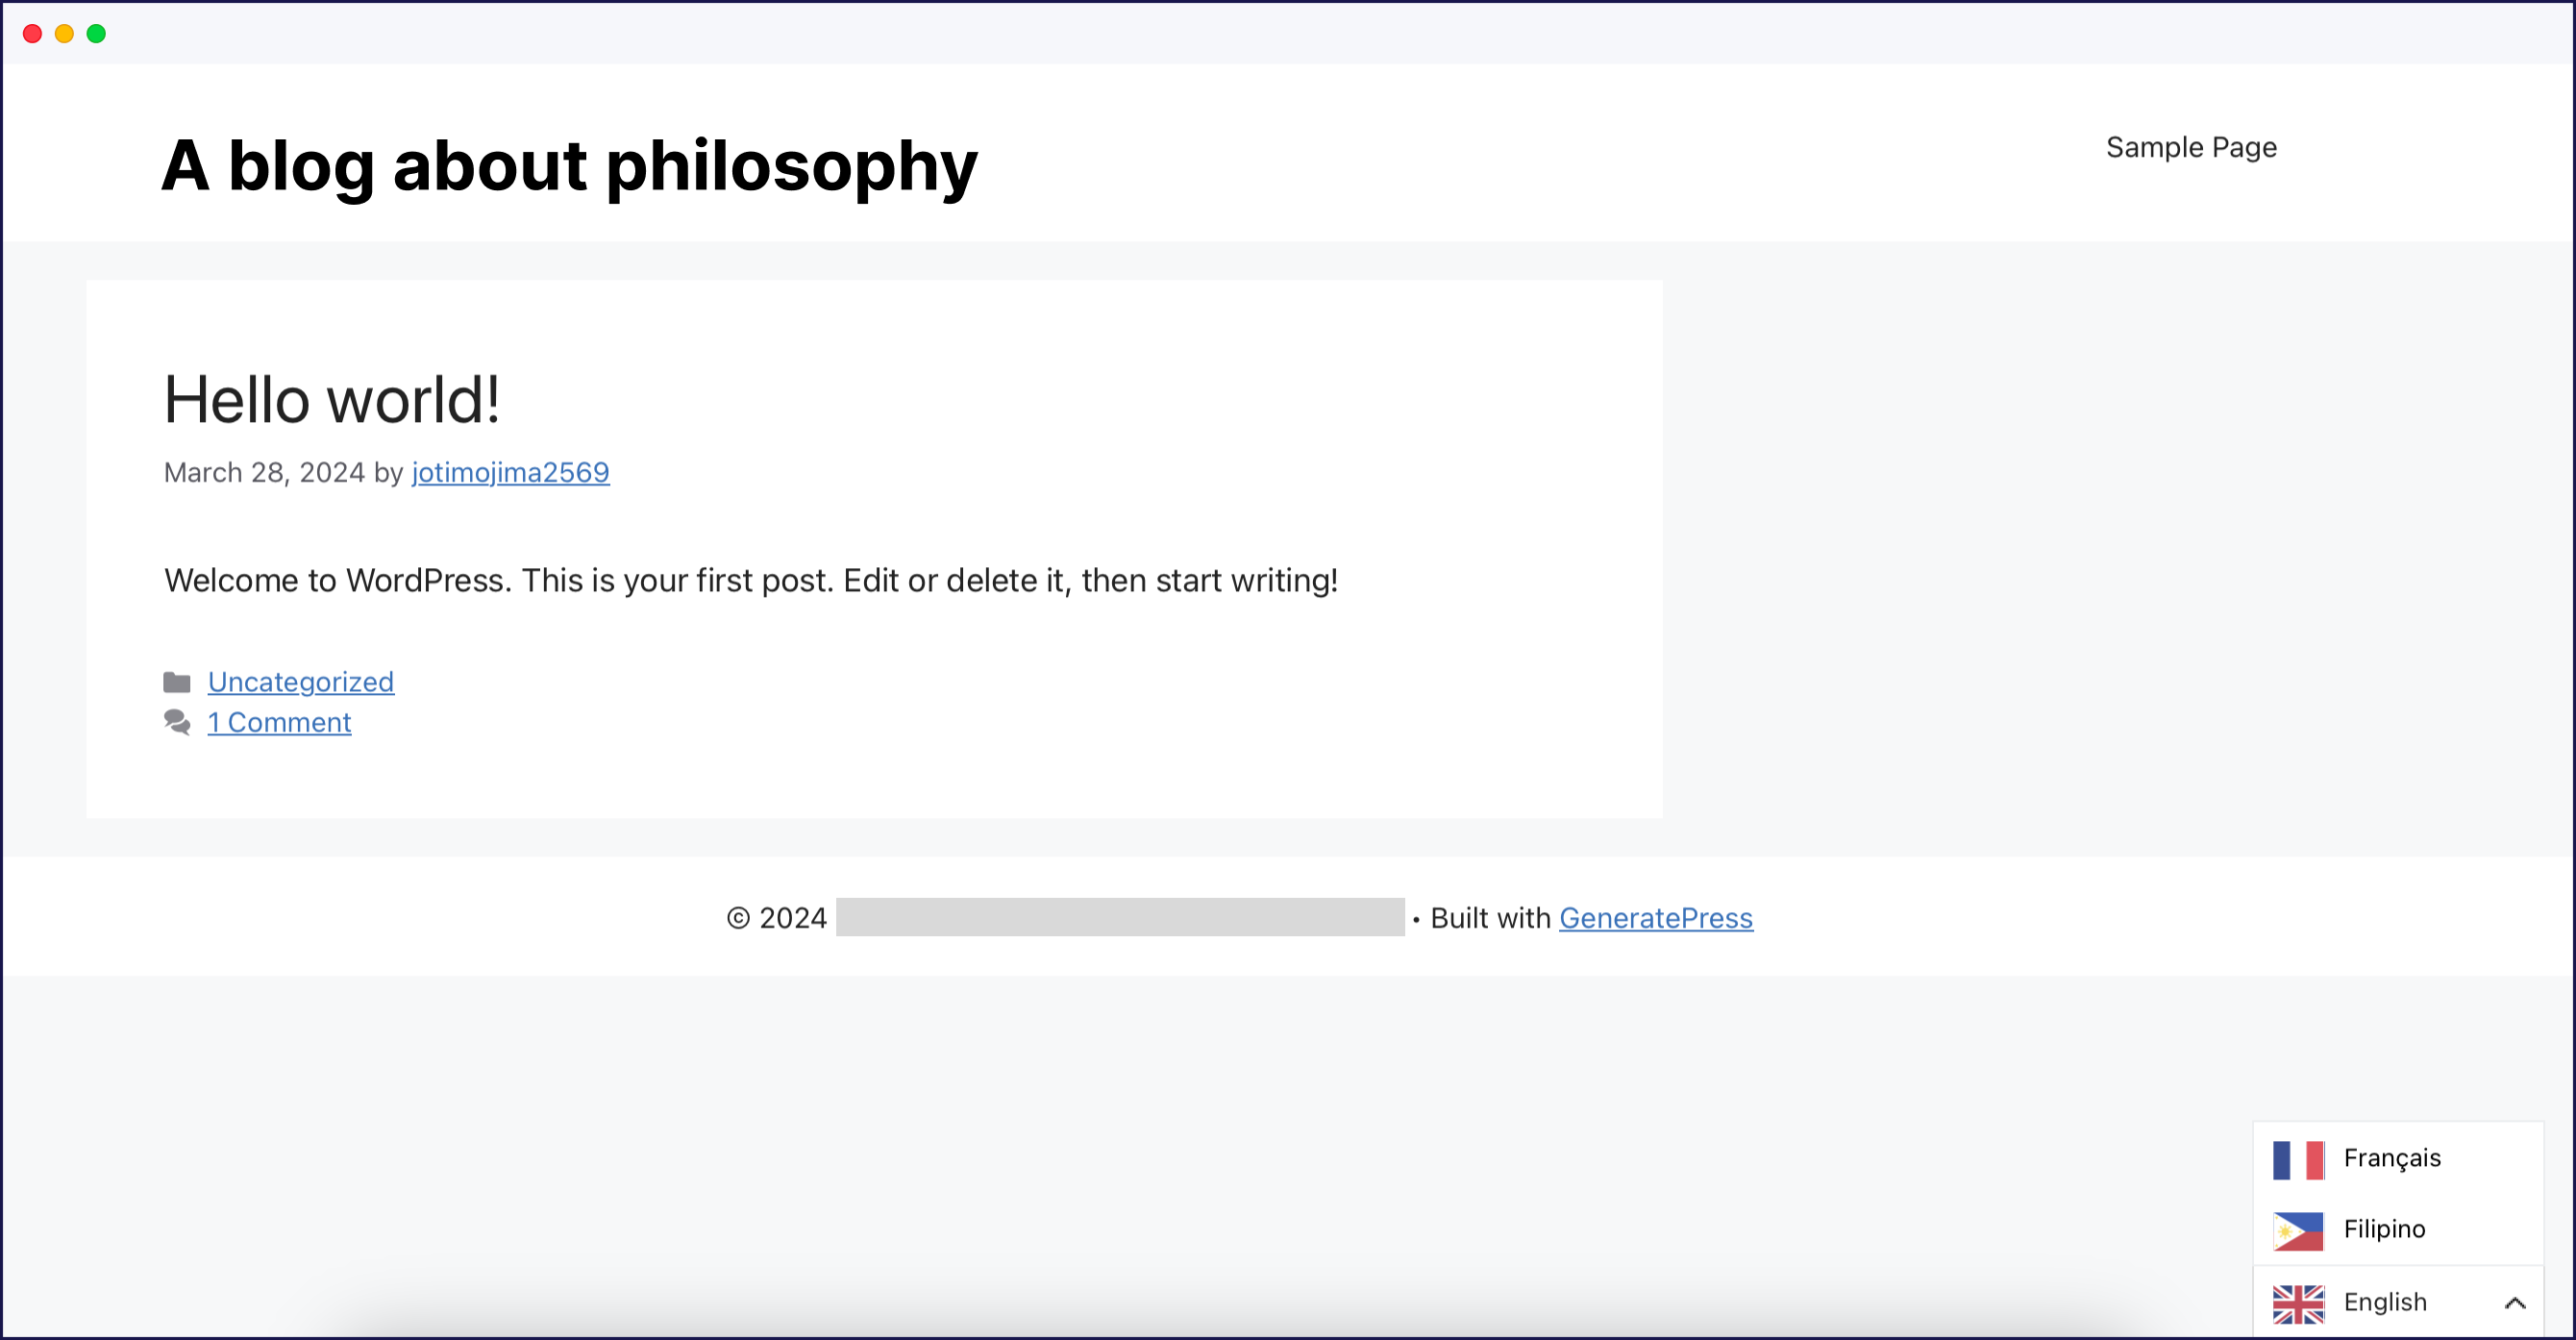
So within the first few minutes, you’re already up and running with a multilingual site and a front-end language switcher.
Customizing the Weglot Language Switcher
If you want to customize the look of the Weglot language switcher, you get a variety of language switcher options in your WordPress admin dashboard.
Without using any code, you can choose…
- Whether or not to make the language switcher a dropdown menu.
- Whether or not to include country flags next to the language switcher.
- What type of flag to display (if enabled) – rectangle mat, rectangle shiny, square, or circle.
- Whether or not to display the language name beside the country flag.
- Whether to use the full language name or just the two-letter country code – e.g. English vs EN.
.png)
Choosing Different Language Switcher Placements
In addition to the different customization options, Weglot also gives you a variety of placement options that you can use to control where your front-end language switcher appears.
Again, the default is a floating language switcher in the bottom-right corner, but you also have options to display it:
- As a menu item
- As a widget
- With a shortcode
- By adding some source code to your theme’s templates or your content
%201.png)
For example, you can add a Weglot language switcher to your menu like you would any other menu item:
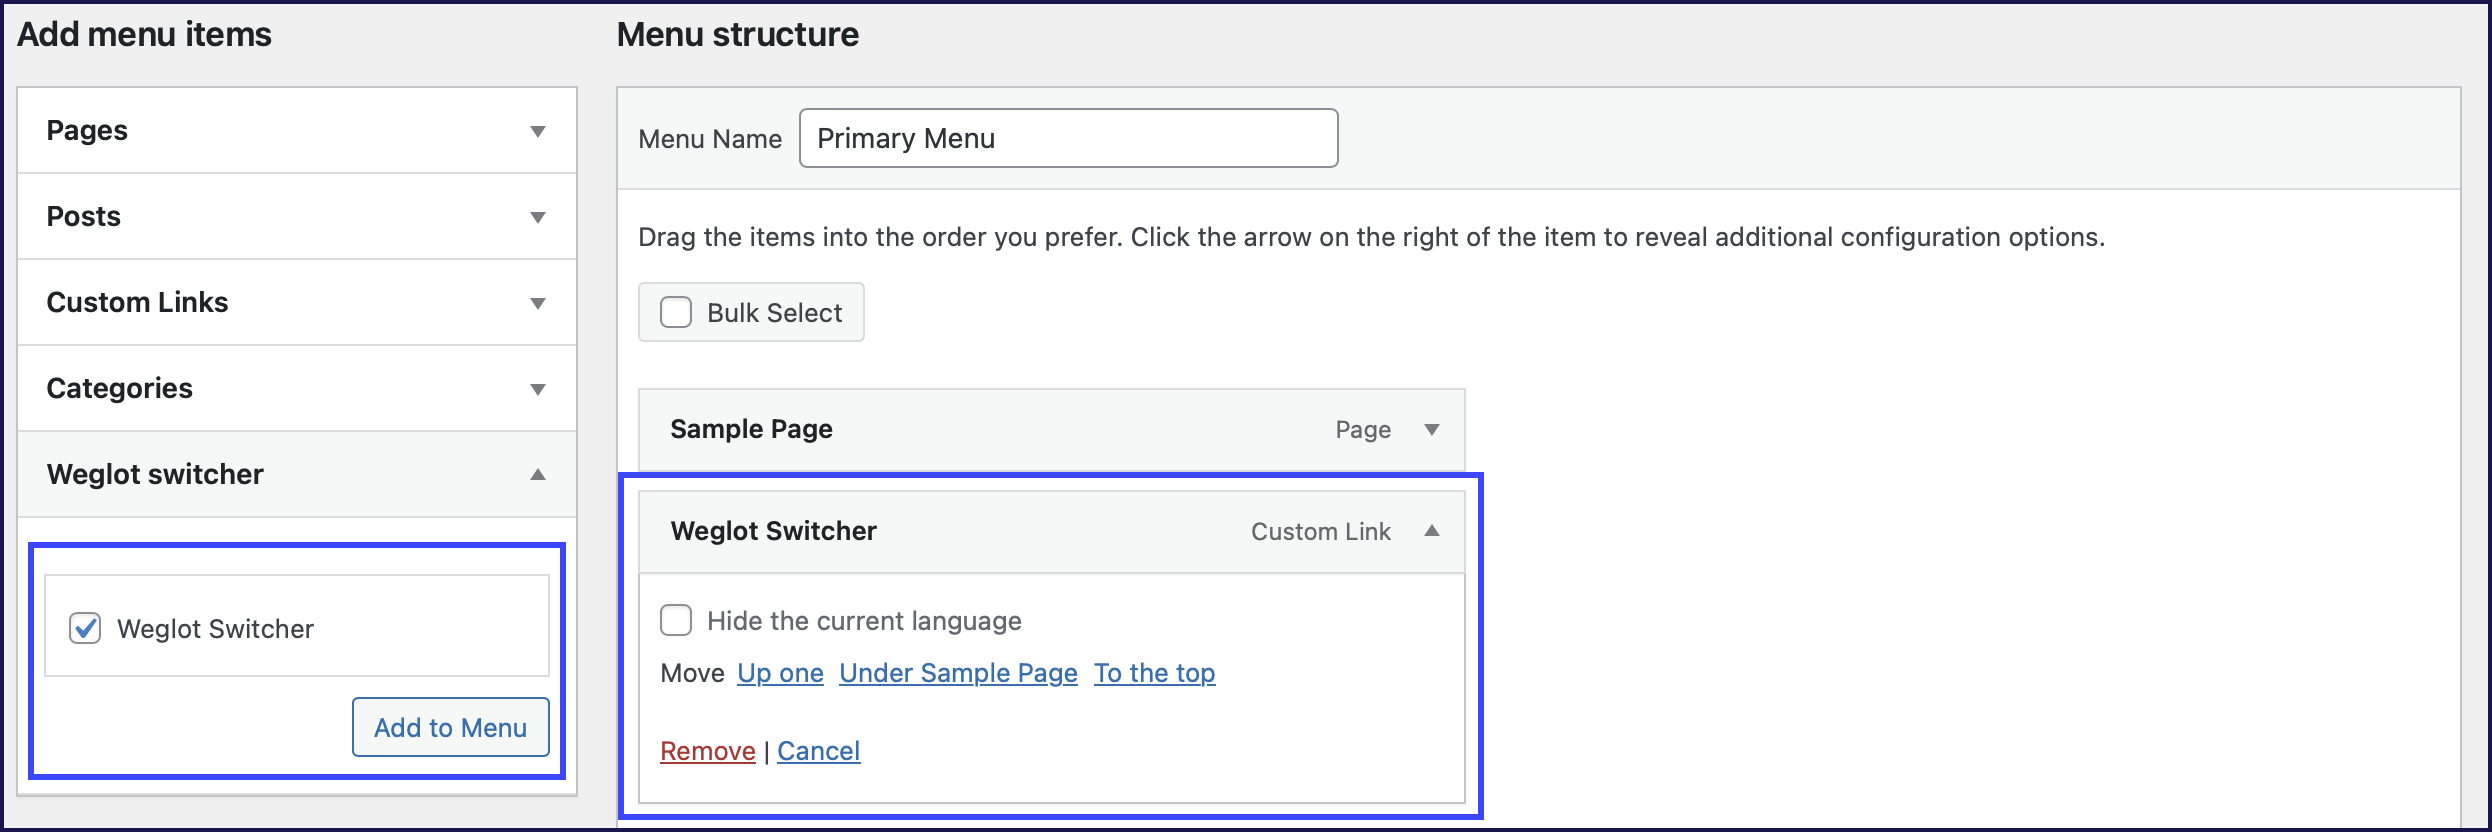
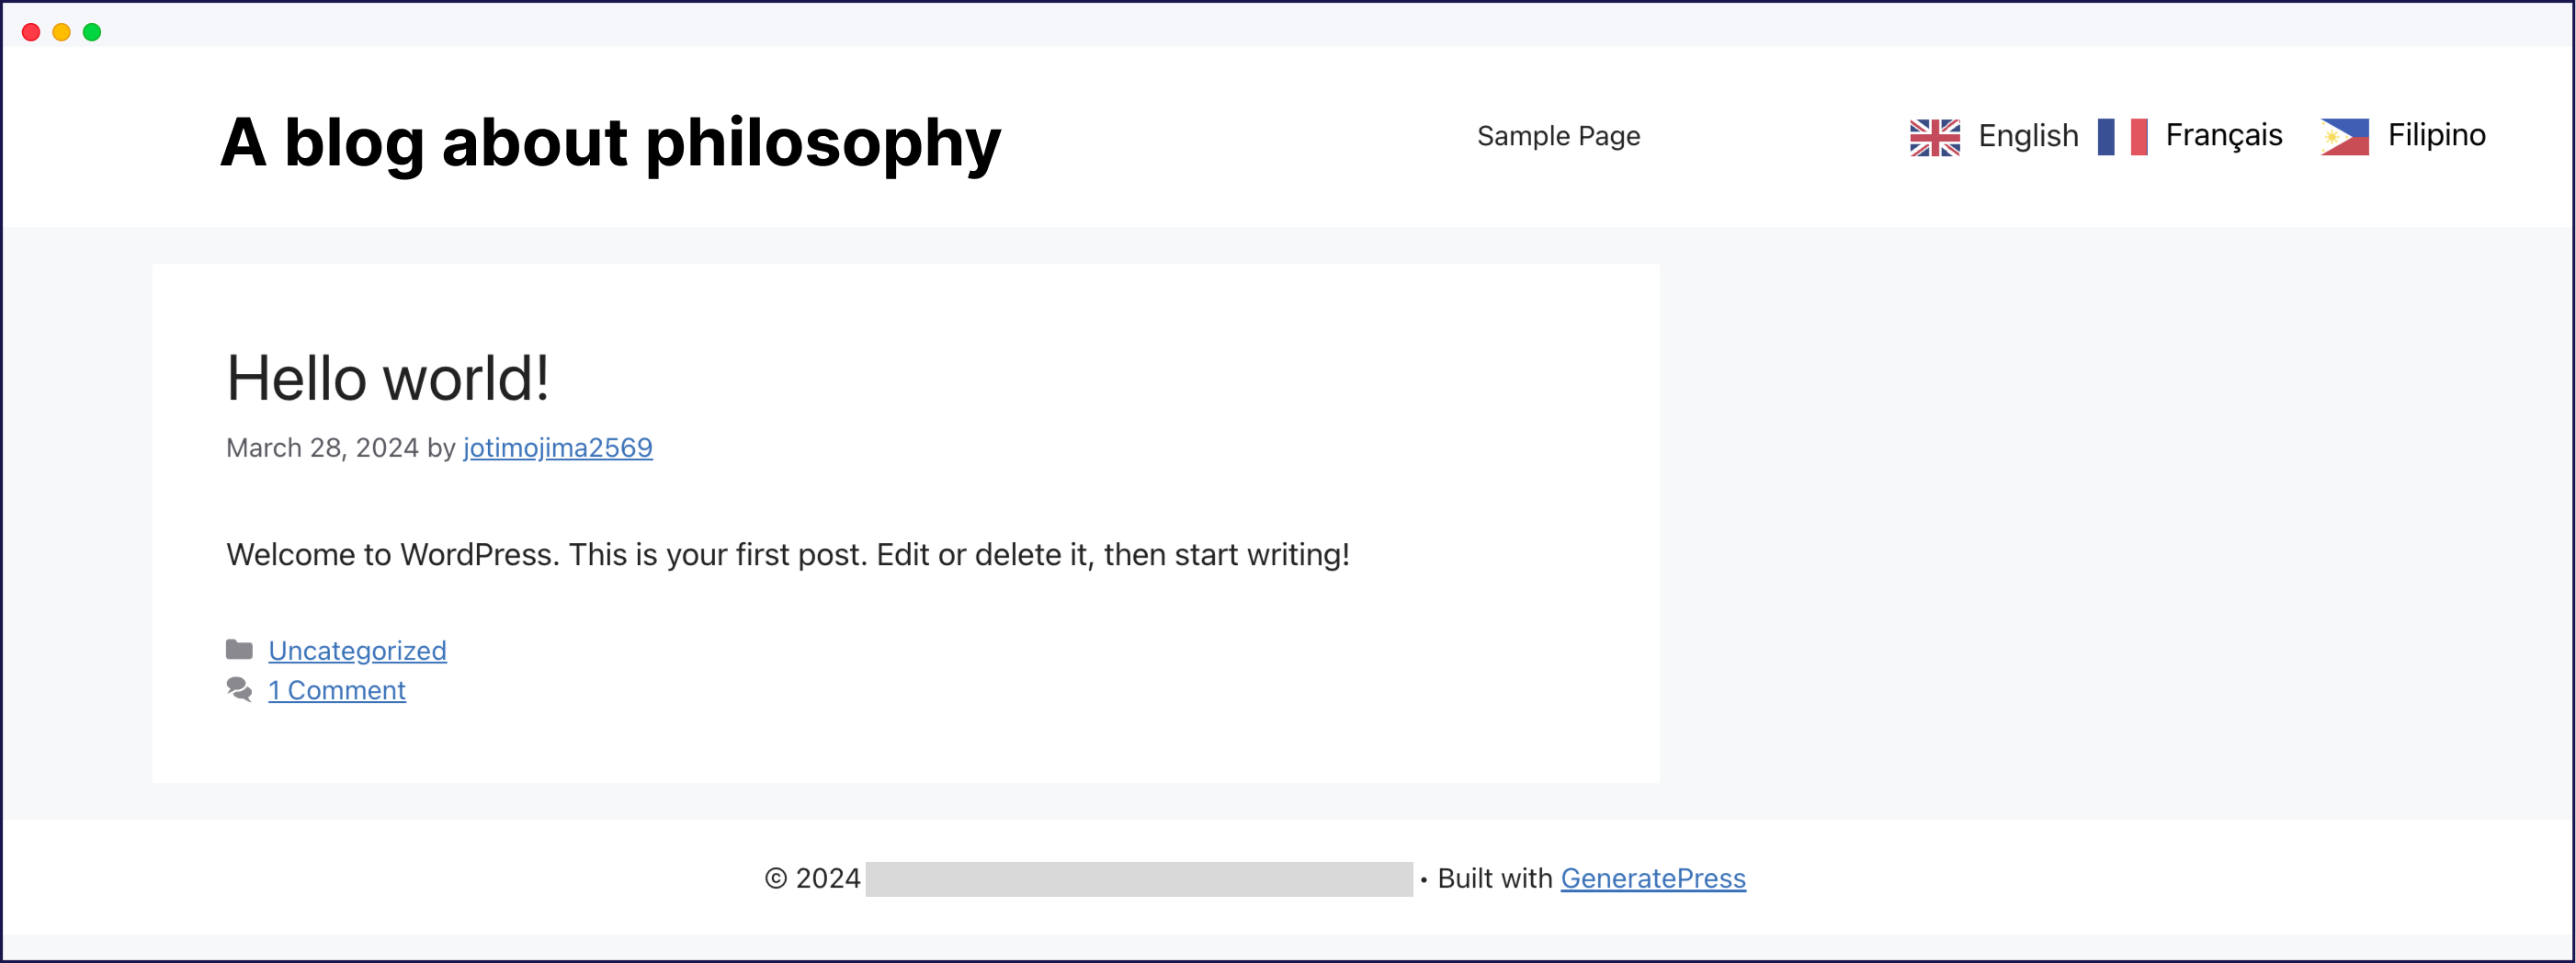
Then, you’d see your language switcher at that spot in your menu instead of as the floating language switcher, as you can see in the screenshot below:
Or, you could use the Weglot Translate widget just like you would any other WordPress widget:
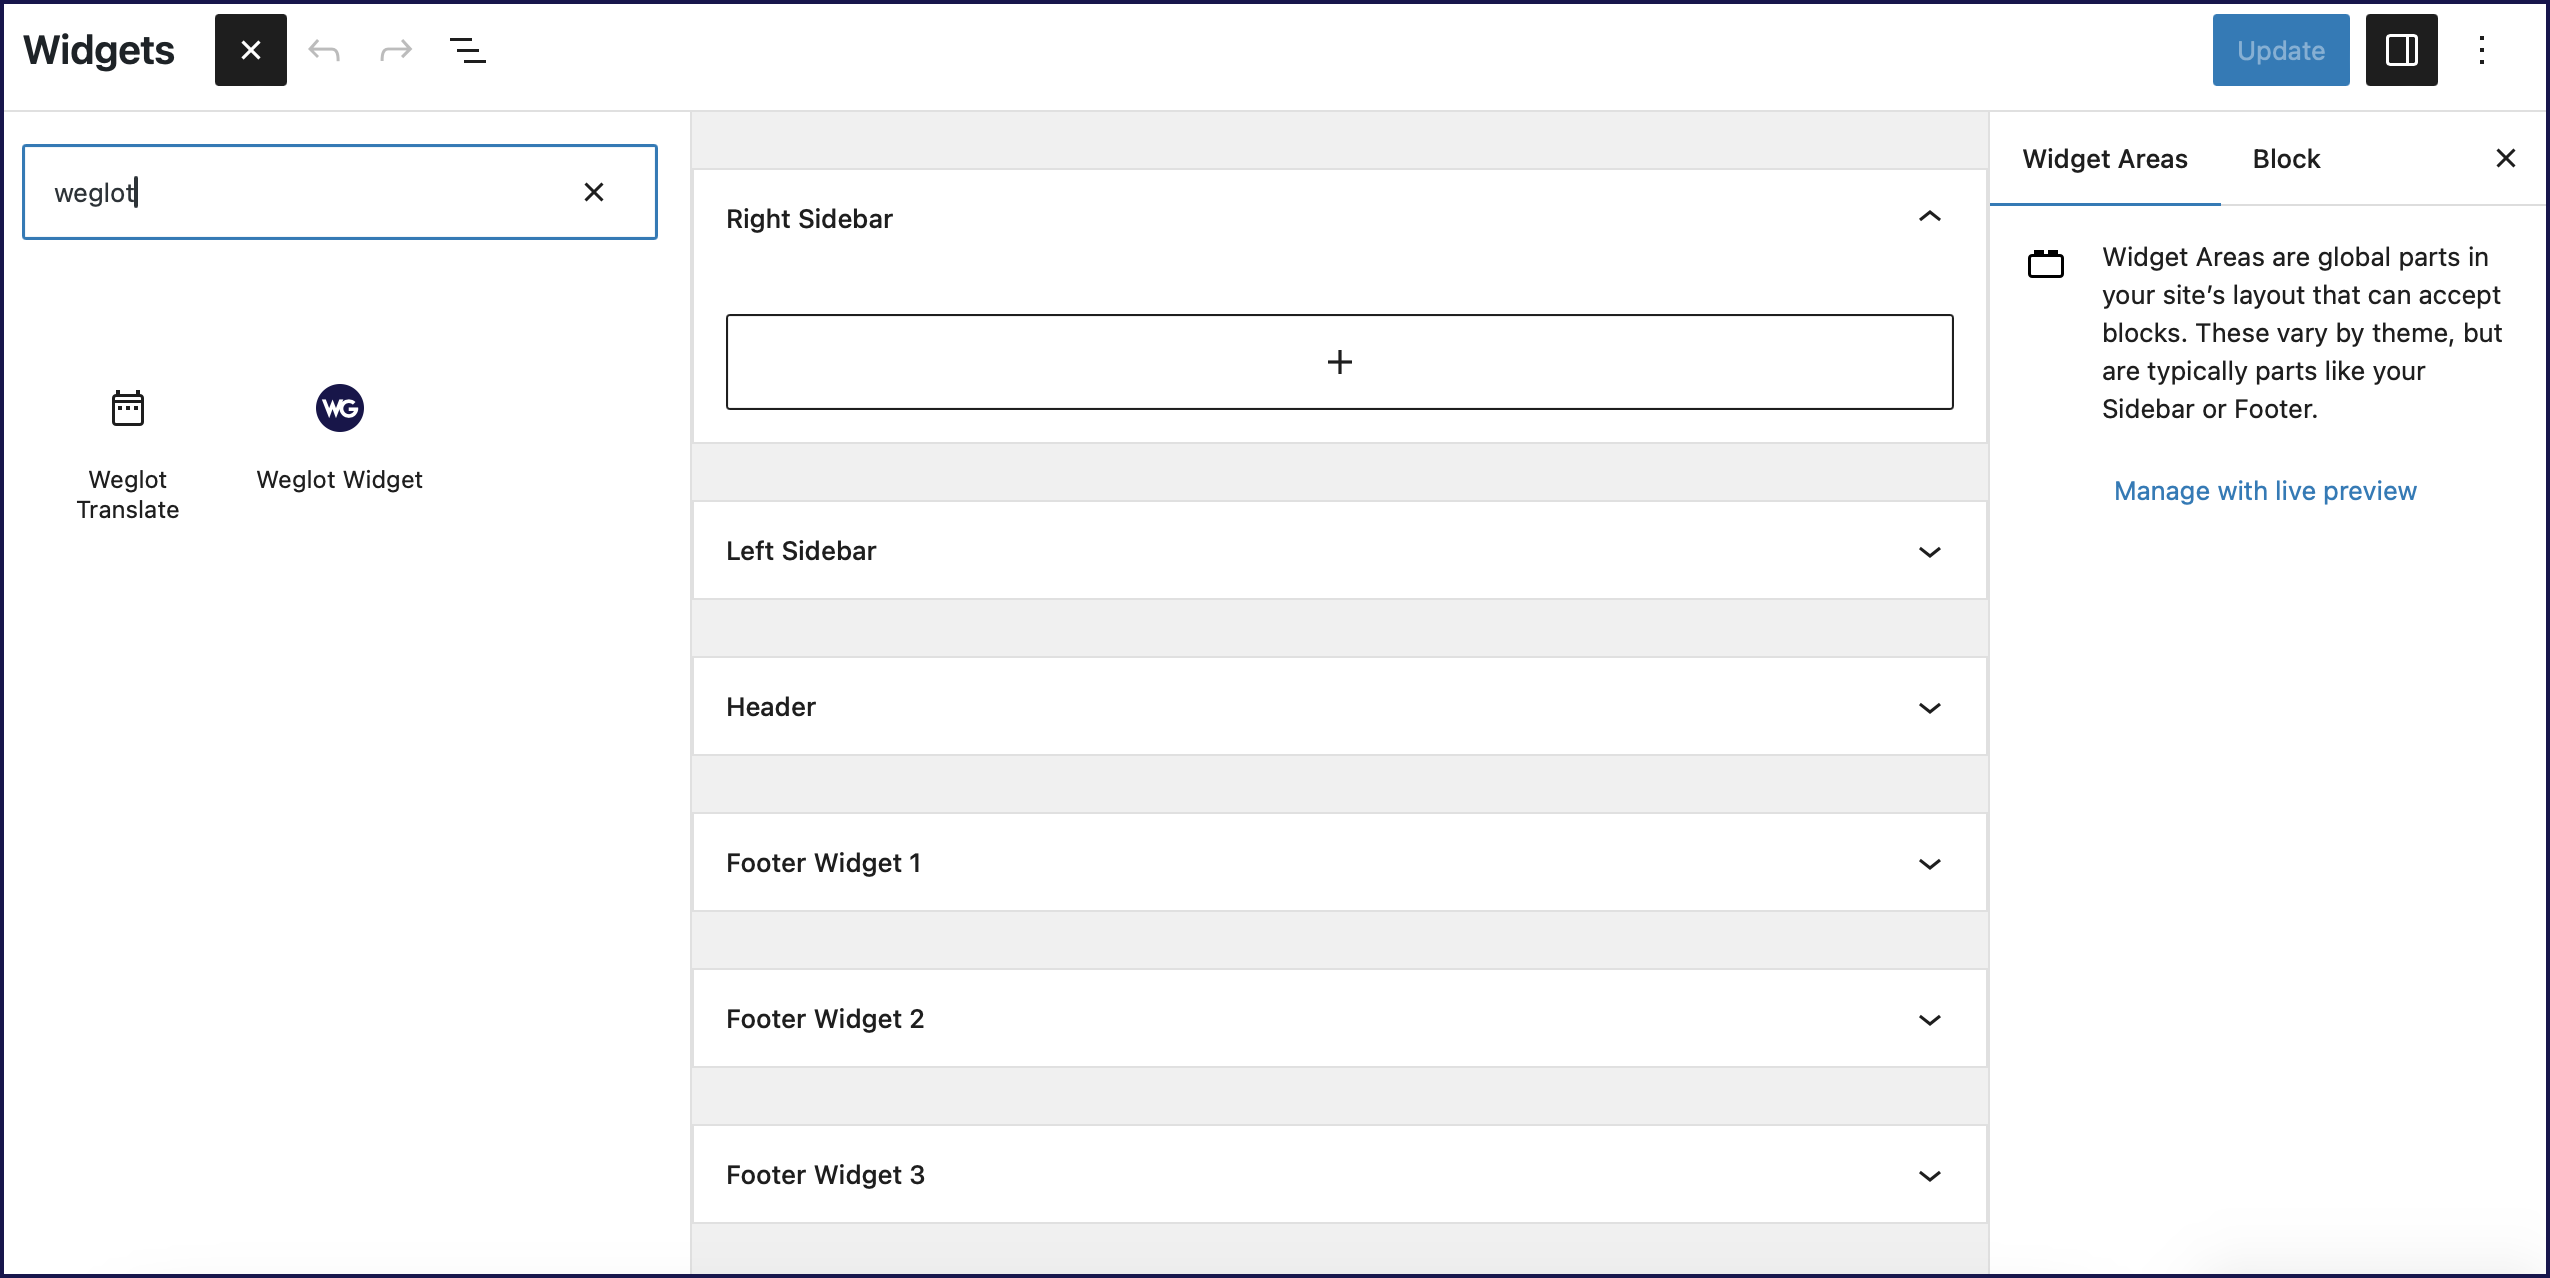
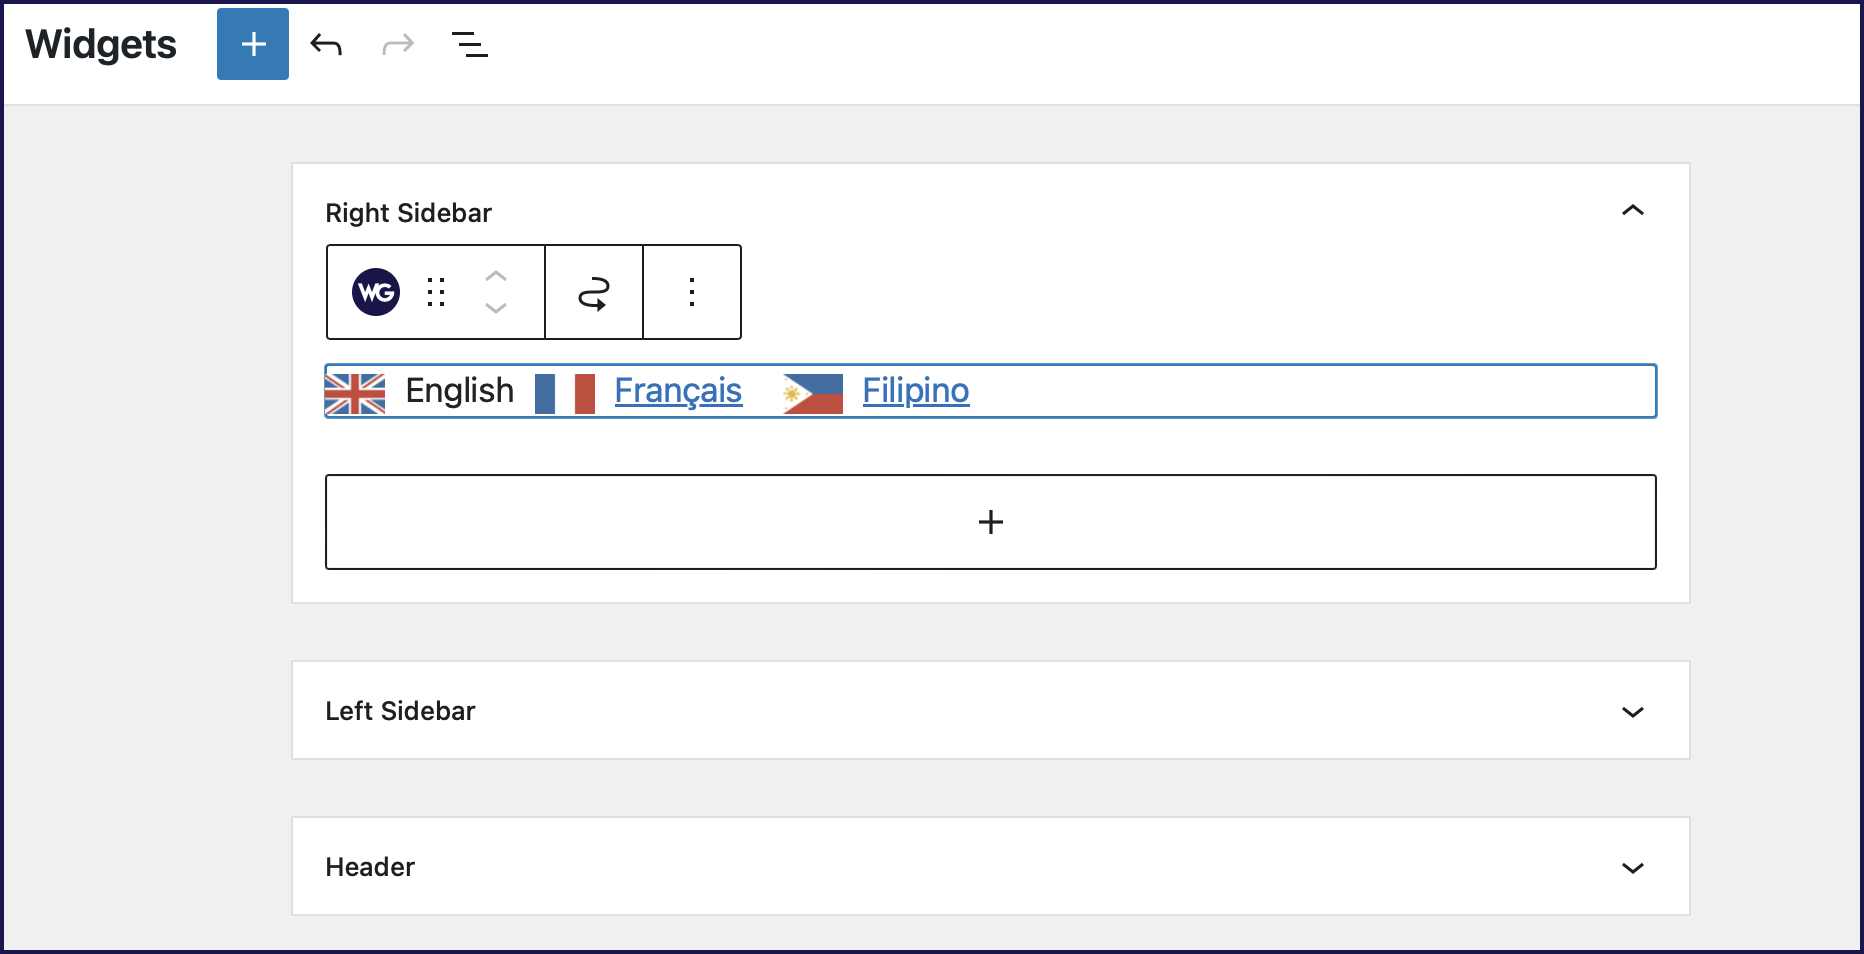
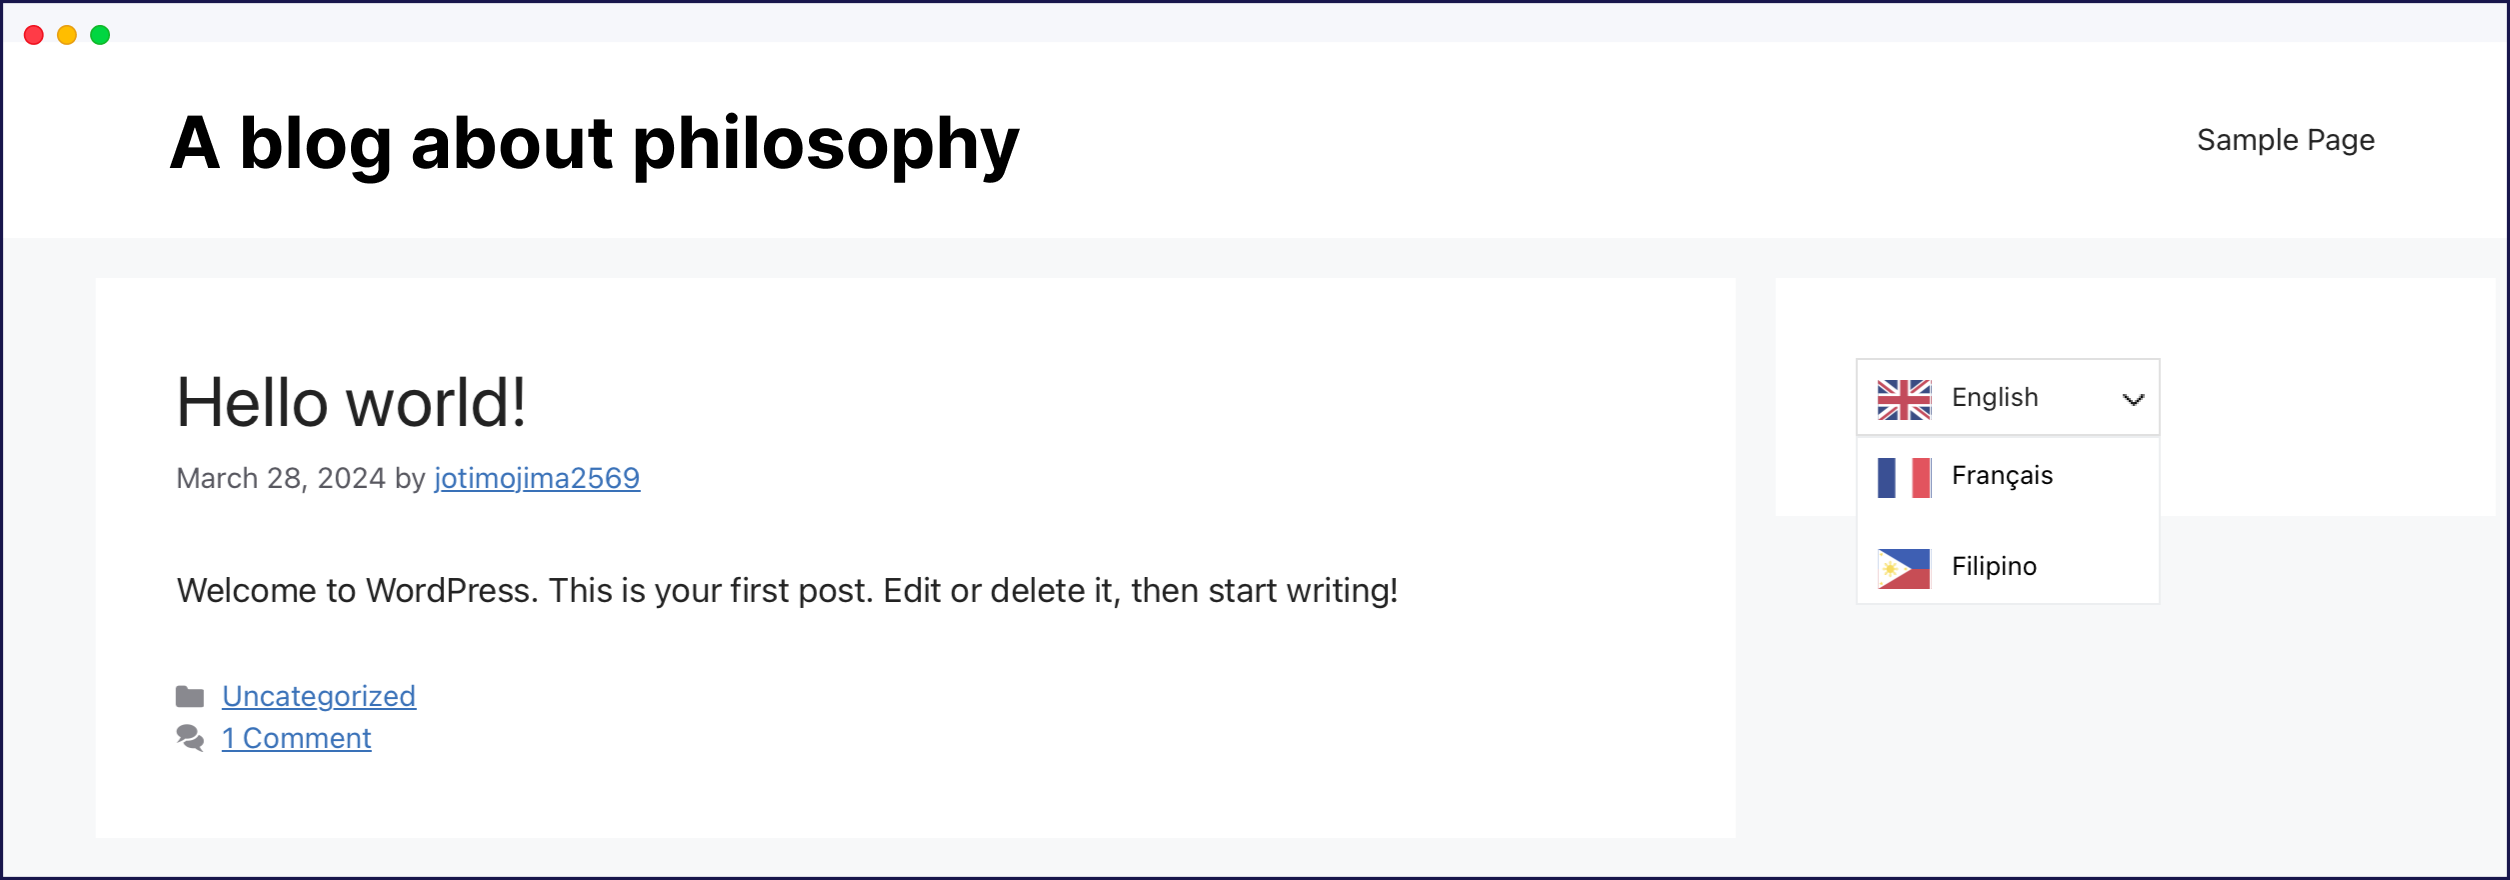
That would add your language switcher to your sidebar or any other widget area (like your site’s footer):
And if you want, you can even automatically redirect visitors based on their browser language, which helps you send them to the right spot without the need for a language switcher button.
Use All the Other Great Weglot Features, Too
Beyond the Weglot language switcher, you’ll also get a bunch of other helpful tools to create a multilingual WordPress site.
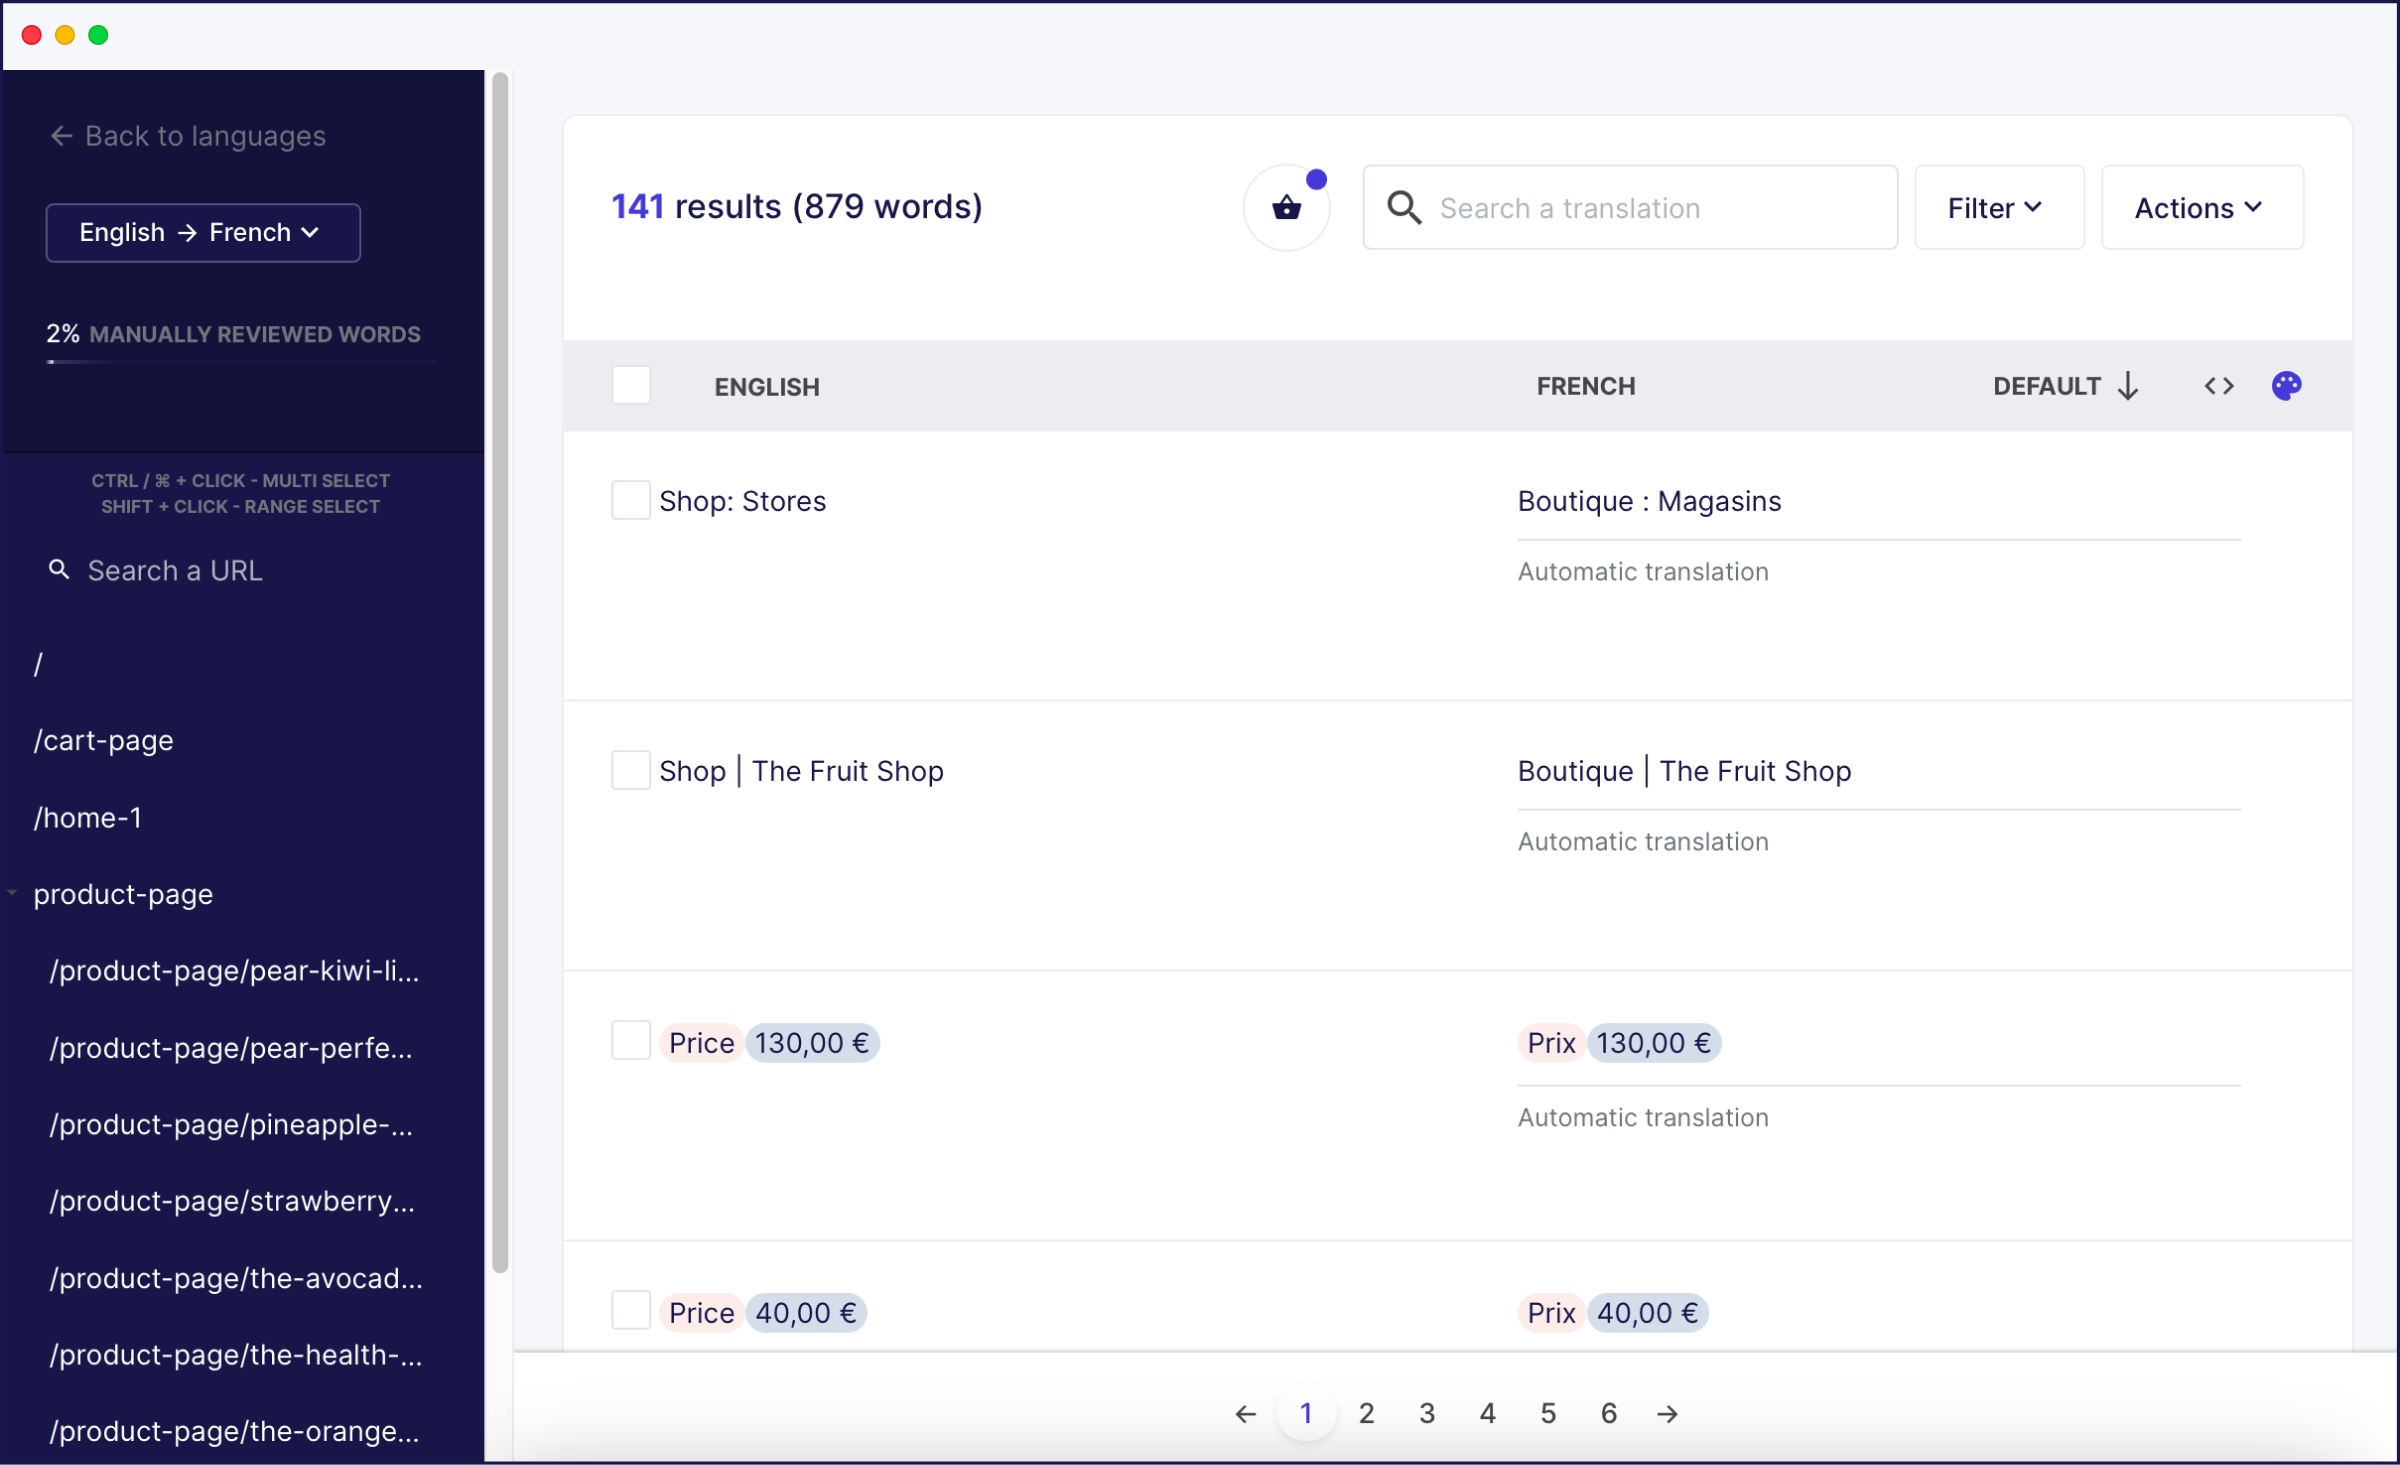
Specifically, you’ll be able to use the Weglot interface to manage all of your site’s translations.
You can use a side-by-side translations list, which holds some similarities to the WPML string translation interface you might be familiar with:
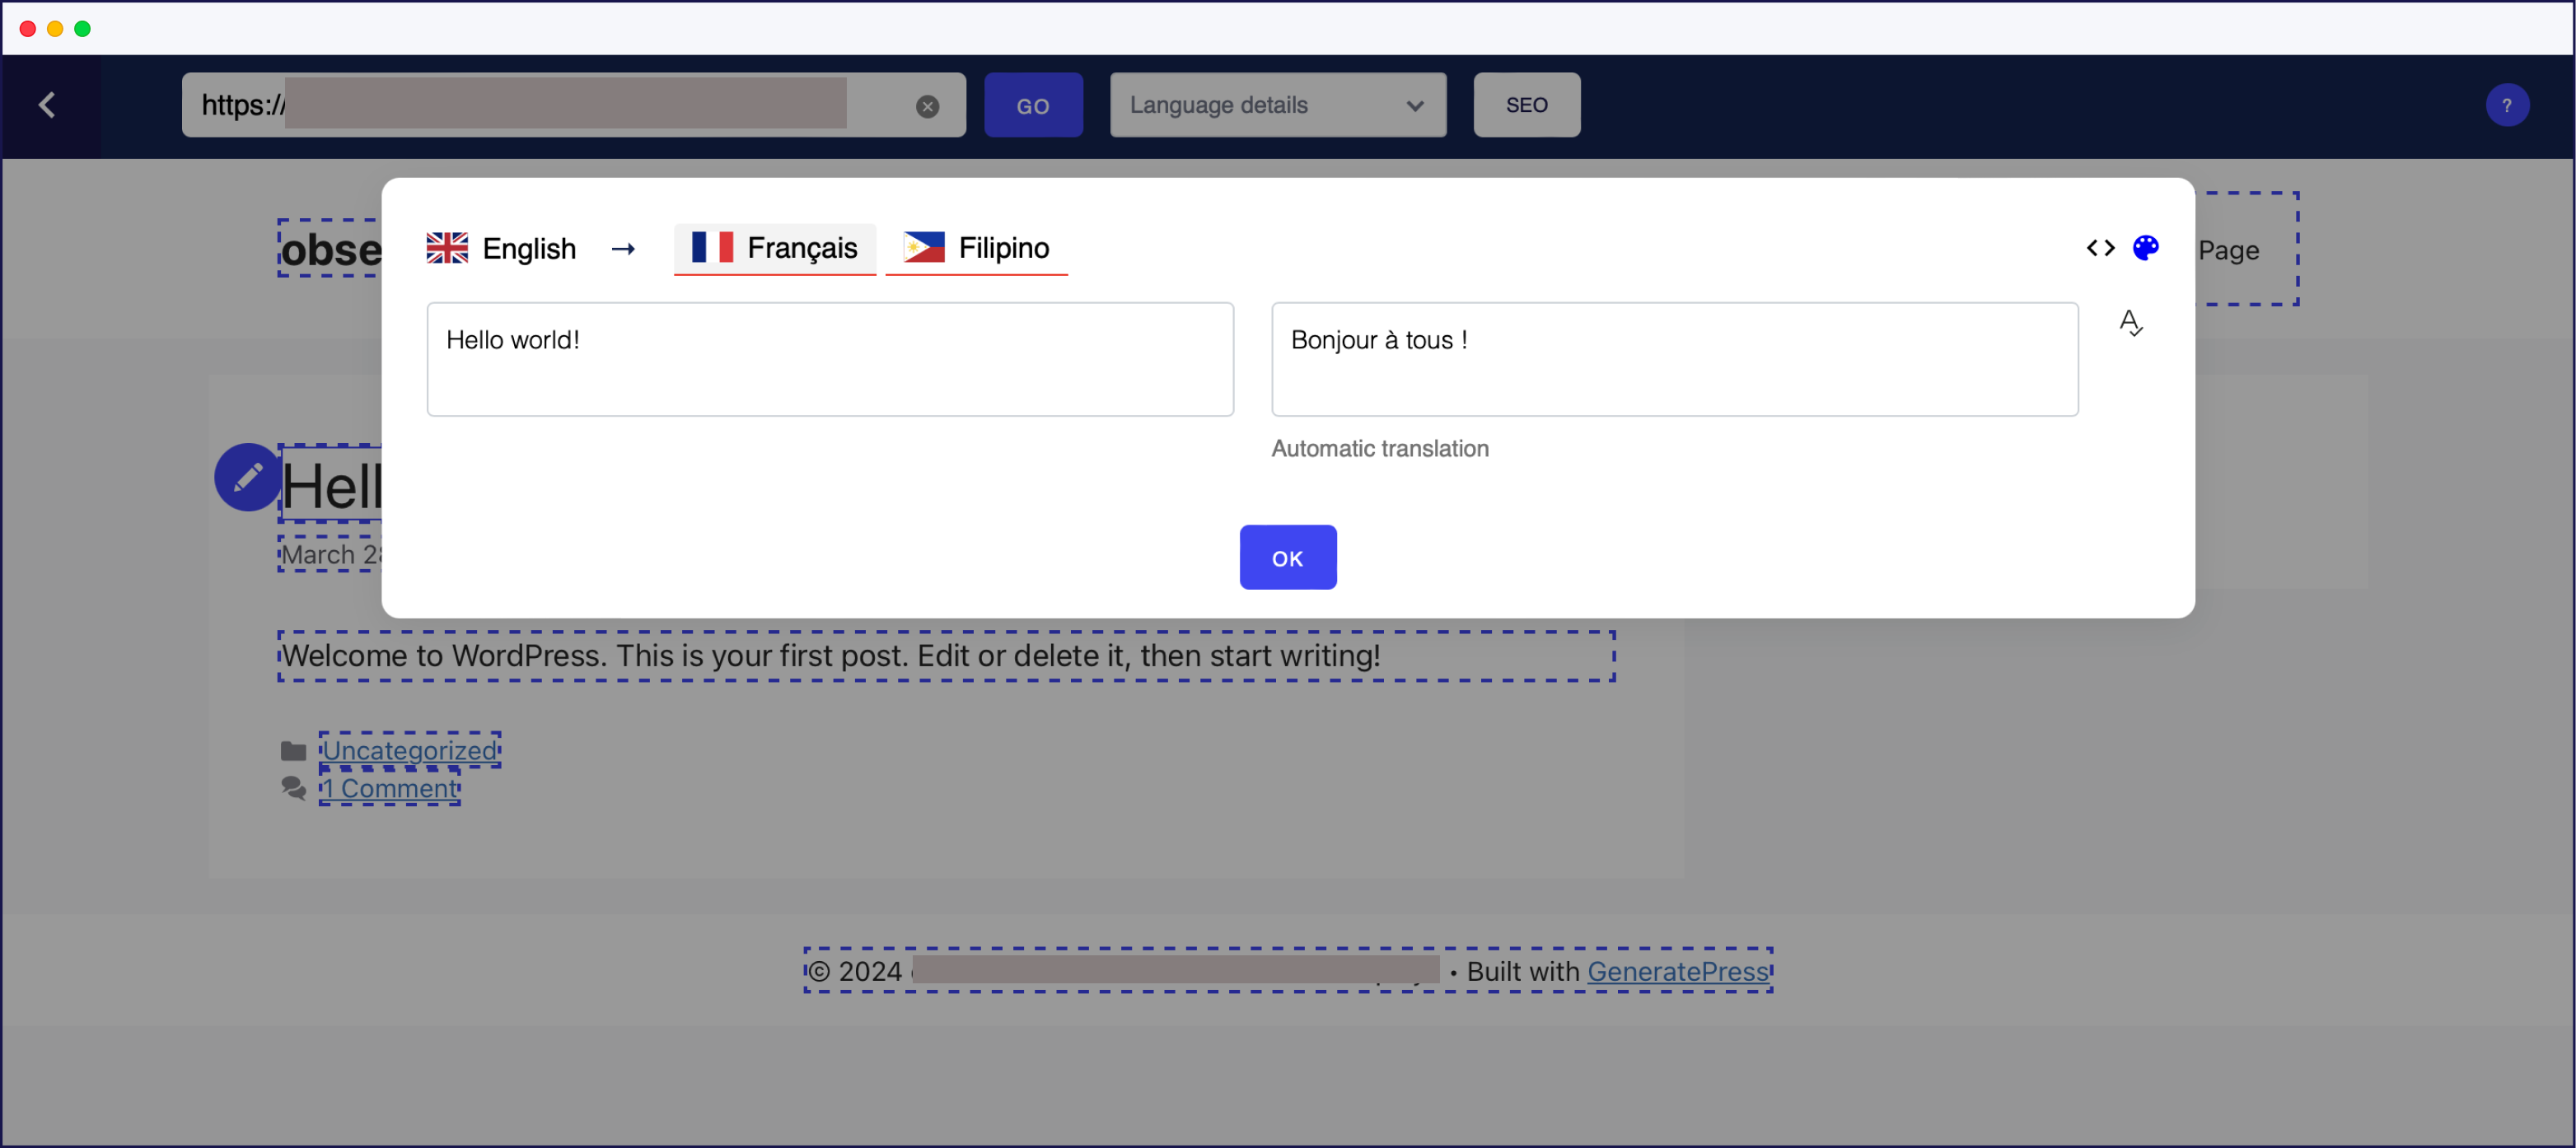
And you’ll also be able to use a totally unique visual interface where you can view a live preview of your site and click on any element that you want to translate:
Pick the Language Switcher That Works Best for You
The WPML language switcher and Weglot’s language switcher both let you add a front-end language switcher to your WordPress site, but they do it with a different approach.
Neither approach is inherently better, but you might prefer Weglot’s approach if you’re looking for a simpler solution because it will let you add a floating language switcher and/or customize your language switcher’s looks without the need for any custom code or technical knowledge.
If you want to try the Weglot language switcher for yourself, sign up for a 10-day free trial to see how it works.


